How To Clean a Camelbak, From Easy Rinsing to Disinfecting
Water is an essential part of any outdoor recreation, that’s why it’s so important to know how to clean a Camelbak or any other similar hydration reservoir. There are essentially three ways to do it: rinsing, deep cleaning and disinfecting. We compiled this guide to make your Camelbak cleaning efforts as painless as possible.
After Every Use – Rinse, Drain, and Dry
To keep your water reservoir in top shape, rinse thoroughly with hot water (optional soap) after every use, especially if you’re filling it with anything other than water. In any case, the key here is the DRAIN and DRY. Because all the reservoirs on the market (by Platypus Hydration, Camelbak, Osprey or Deuter) are soft-sided, they’re tough to dry with the sides sticking and trapping moisture.
I have a perfect drying set-up at my house with an oscillating towel rack (pictured below, cost about $15 at our local kitchen shop) that is great for hanging my reservoir upside down. I use the orange slider seal on my Deuter Streamer to keep the top open so it dries best; I’ve also read of people using a Q-tip to prop open the top. However, you choose to dry your reservoir, remember it’s one of the most important steps you can take.
After 3 to 4 Uses – Deep Clean
I use Platypus’s recommended method since it seems to be the most thorough and well explained. Here are the steps:
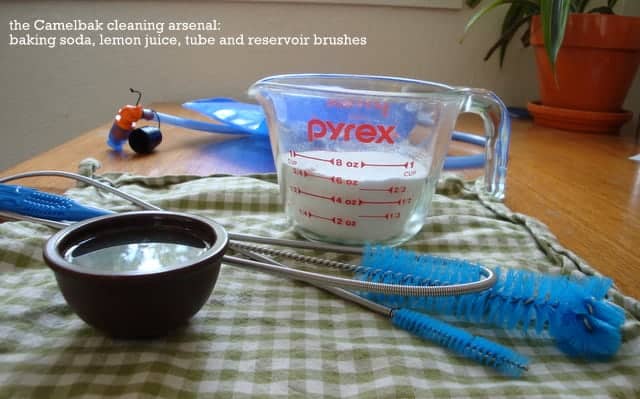
1) Add ¼ cup baking soda to ¾ cup of water per liter volume of your reservoir and shake for 30 seconds
2) Add ¼ cup lemon juice, shake for 10 seconds, then vent by loosening cap away from face (note that adding lemon juice causes effervescence/pressure)
3) Repeat shake/vent 3 times
4) Expel as much air as possible and soak for 20 minutes
5) Rinse 3 times with hot water
The deep clean should also include brushing out the inner surface, including the tube. I use the CamelBak Cleaning Kit, which includes brushes for the tube and reservoir. Simply disassemble all the parts and give them each a scrubbing. I brush AFTER the baking soda/lemon application to help clean out all the baking soda residue.
A note about bite valves: When doing the deep clean and brushing, it’s best to remove the bite valve to make it easier to clean the whole tube. It’s a bit hard to get it off the tube though. Does anyone have a good method?
When You See Mold – Disinfect
I am notorious about forgetting my reservoir, leaving it in a dark pack, half-full, for several days, even weeks sometimes. Sadly, this happened in a bad way after I did the Great Ski Race this year. I didn’t have any liquid left in the reservoir so I didn’t bother rinsing and cleaning, but it turned into a nasty case of mold since I was using an electrolyte mix during the race.
If this happens to you, it’s time to bring out the big guns and disinfect your Camelbak or other brand-name reservoir. Disinfecting takes general cleaning a step further by killing microscopic organisms. Most all experts recommend using bleach, or a chlorine-free alternative like these Cleaning Tablets or, hint-hint, Seventh Generation’s Free and Clear.
Here’s how to disinfect your Camelbak or another hydration reservoir:
1) Fill the bladder and hose with 1-oz of bleach per liter of warm water
2) Soak overnight
3) Rinse well with warm water and dry completely
If you have any tips on how to clean a Camelbak or cleaning other hydration reservoirs and bottles, let us know in the comments.
More tips on gear maintenance: Learn how to wash any outdoor jacket, step by step.
Disclosure: Some of the links in this post are affiliate links, meaning, at no additional cost to you, Tahoe Mountain Sports will earn a commission if you click through and make a purchase. Affiliate commissions help fund the content for this blog.


I followed the steps for “Deep Clean” as described, but when I opened the Camelbak in between 10s shakes, there was no pressure release.
Does this mean it’s not working properly, or is the amount of pressure build-up highly variable?
Leave a comment